
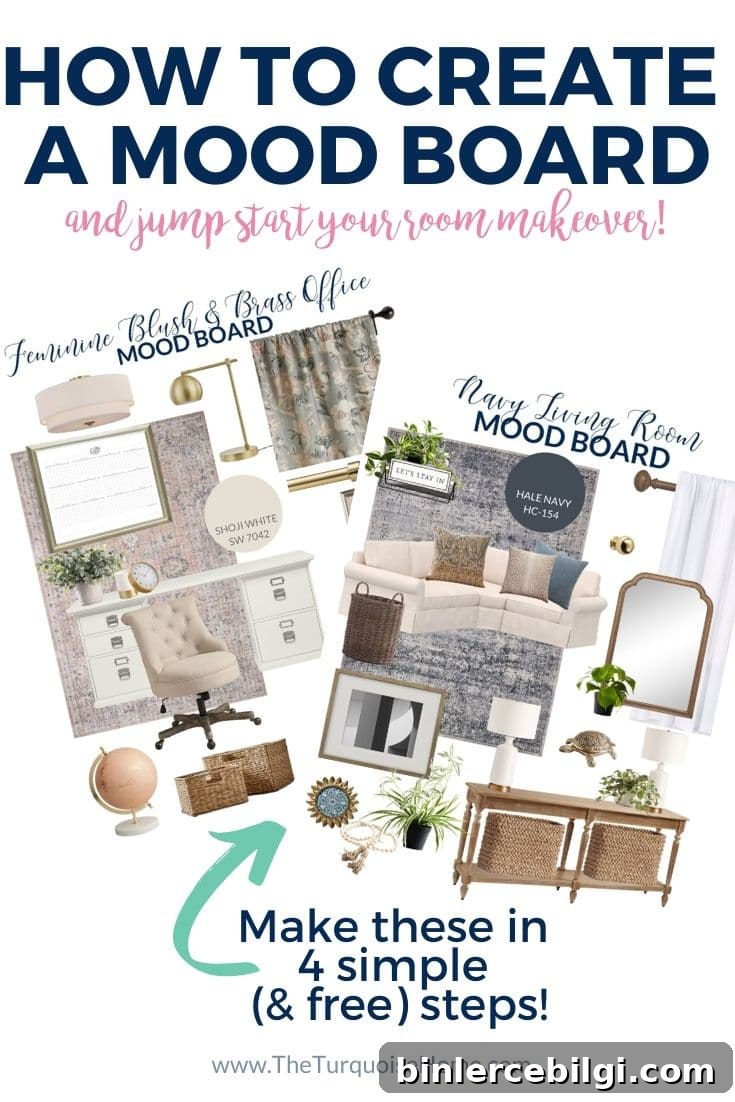
Create a mood board every time you start a room makeover. It’s a simple, effective way to visualize the room before you buy a single item or paint a wall. A mood board is hands-down the best tool for planning a room’s design.
After I shared my office vision board, many of you asked how I made it. Today I’m walking through the exact process I use to build a digital mood board—step by step—so you can jump-start your own room makeover.
This post includes affiliate links for convenience. See my full disclosure policy here.
If you’re just getting started, you may also want to read my How to Start a Room Makeover post for the preliminary steps to take before creating a mood board.
I’ve been making design boards throughout my blogging years, and the tools have evolved considerably—so it’s much quicker now than it used to be. I personally use Canva Pro to speed up my workflow, but this guide shows options so you can make a professional-looking mood board for free.
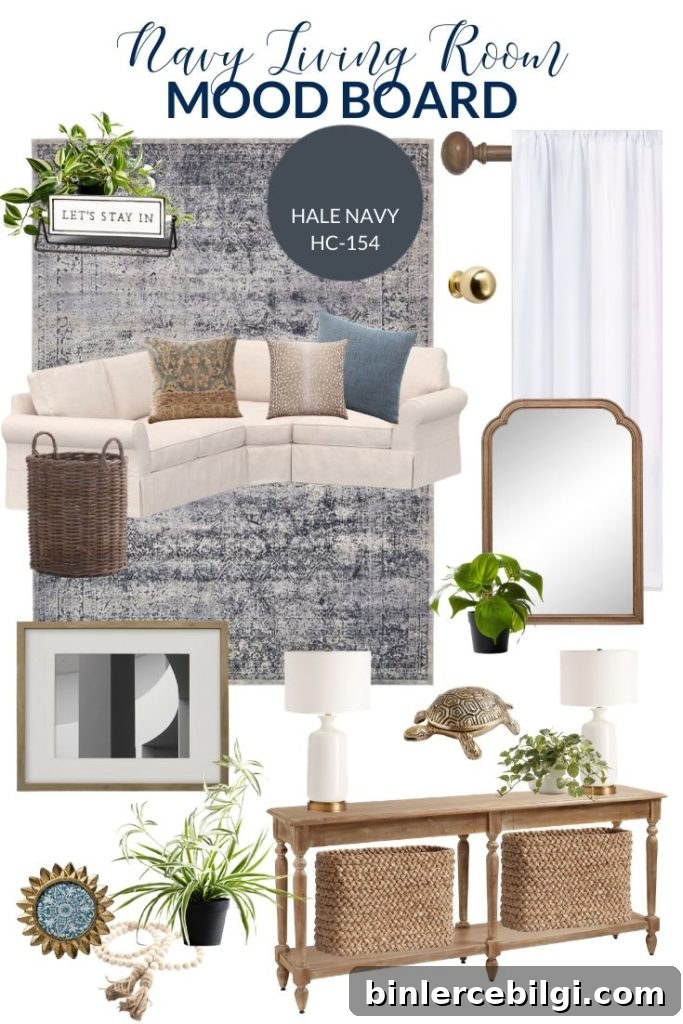
The goal of an interior design mood board is simple: it helps you see how colors, furniture, textiles, and accessories will work together in a room. Even when I can picture a space in my head, I always create a mood board to confirm that everything harmonizes. If something feels off on the board, it’s easy to swap elements before buying anything—saving time, money, and unnecessary returns.
Steps to Create a Design Board
I’ve also recorded these steps in a video walkthrough if you prefer to watch the process instead of reading the directions.
1. Find and Save the Design Elements You Want to Use
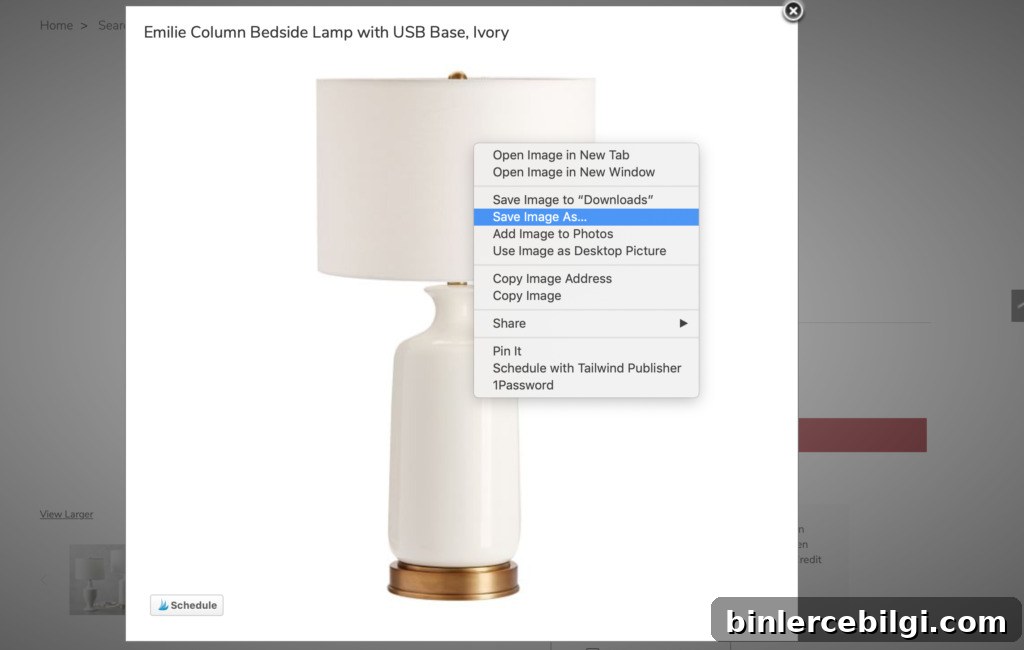
Start by collecting images of items you already own and pieces you’re considering purchasing. Visit online stores or manufacturer sites and save clear photos—ideally ones with white or minimal backgrounds to make later editing easier. On a computer, right-click the image and choose “save as”; on some sites you may need to open a larger version first. If an image can’t be saved directly, take a screenshot and crop it.
2. Remove Backgrounds and Save Images as PNGs
Removing image backgrounds isn’t mandatory, but transparent backgrounds create a cleaner, more flexible mood board. There are paid tools like Canva Pro and Clipping Magic, and several free background removers available if you search “free background remover.” Upload each image, remove the background, then download it as a PNG with a transparent background. If the automatic result needs tweaking, use the touch-up tools to restore or remove small areas until the cutout looks right.
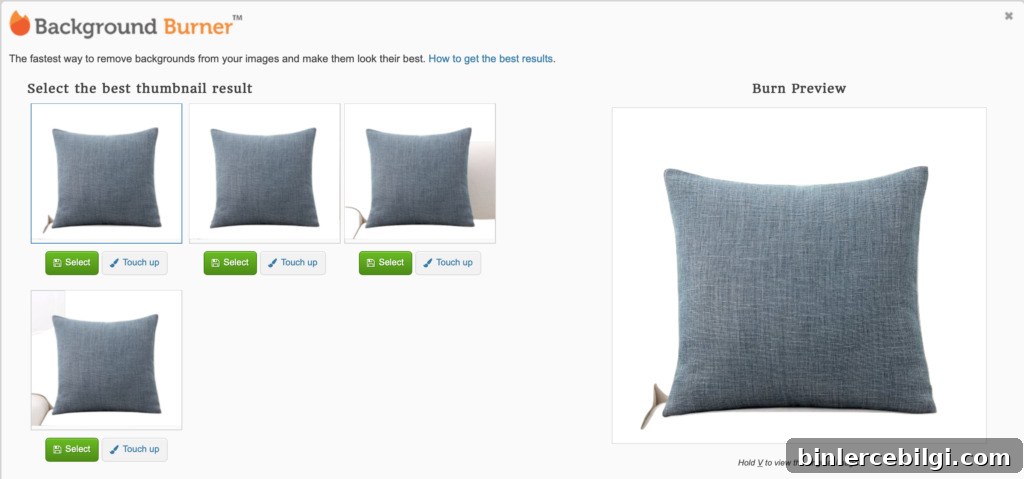
If you use Canva Pro, its built-in Background Remover under Effects is an easy option: upload the image, add it to your design, select Effects, then Background Remover. For non-subscribers, free background removal tools work well—choose the one that gives you the cleanest cutouts.
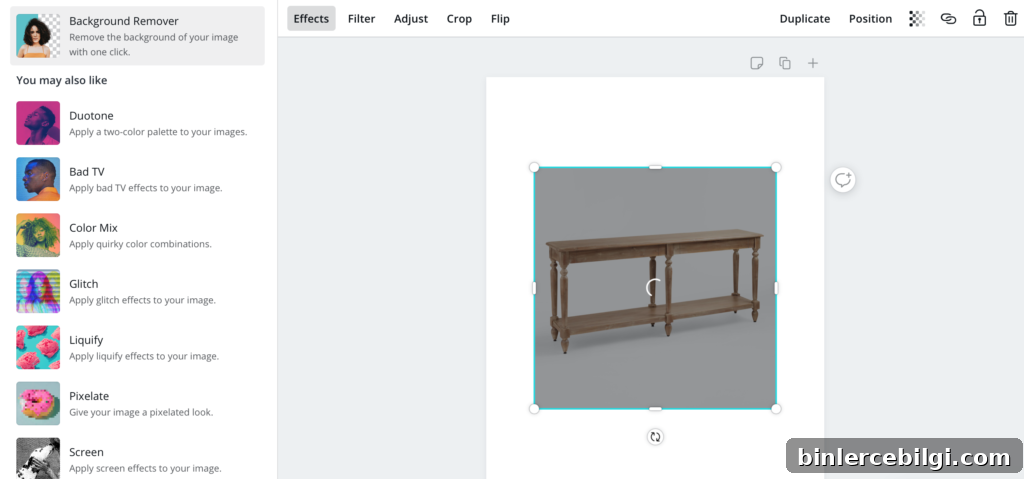
Transparent PNGs allow you to layer images so you can see how pieces overlap and interact—very useful when testing scale, placement, and color combinations.
3. Create a New Design in Canva and Upload Your Images
Open a design program—Canva is an accessible option—or any image editor that supports layers and PNG transparency. In Canva, click “Create a design” and choose custom dimensions; a common size I use is 735 x 1102, but use whatever works for you. Upload all your PNGs to the project so they’re ready to arrange.
4. Arrange and Refine the Layout
Drag your images onto the canvas and arrange them like a collage. Start with the largest furniture pieces to establish scale, then add rugs, lighting, and smaller decor. Use position controls to send items forward or backward and duplicate elements when you need multiple of the same item. Keep adjusting spacing, scale, and layering until the composition reads well and feels balanced.
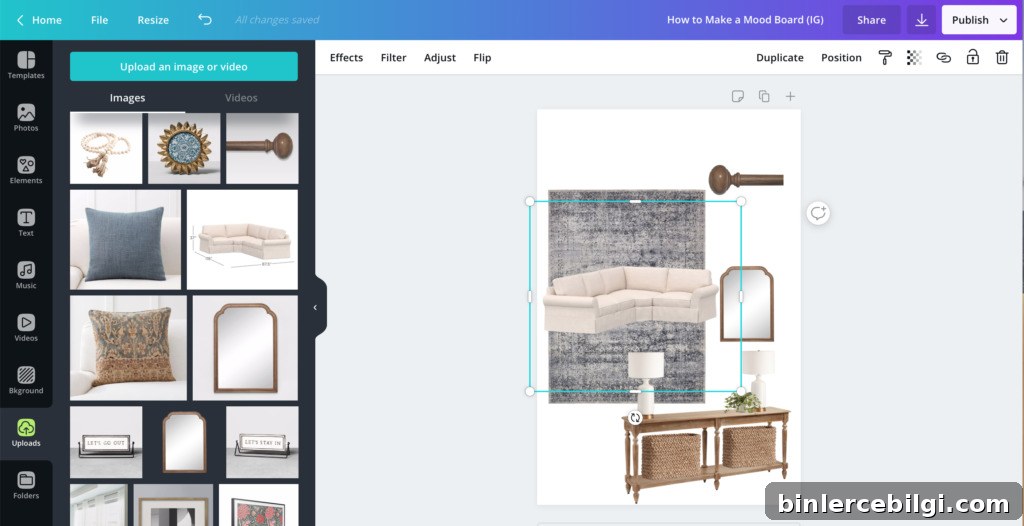
A completed mood board is a practical blueprint for shopping and styling. It reduces guesswork, prevents costly returns, and helps you confidently choose the right fabrics, finishes, and accessories. I use mood boards for every room makeover so I can experiment with different lighting, furniture styles, and color accents before making purchases.
Video: How to Create a Mood Board
If you prefer a visual walkthrough, I recorded each step in a video that demonstrates the entire process. Watch it to see the workflow in real time and pick up a few practical tips as I build a board from start to finish.
Once your mood board is ready, share it with friends or family for feedback—or keep it as your private roadmap for the makeover. If you have questions, feel free to leave them in the comments below.
More Posts You Will Love:
- Butler’s Pantry Ideas: 10+ Beautiful And Functional Designs
- Traditional Dining Room Reveal
- 16 Economical Laundry Room Ideas
- 7 Ways to Refresh a Kitchen
- Above Bed Decor: 12 Ideas for Decorating that Odd Space